• WORK
  • ABOUT
  • CONTACT
  • BLOG
Menu

AMANDA MURPHY

  • WORK
  • ABOUT
  • CONTACT
  • BLOG
×
Hand holding up DSLR camera.

5 Tips For Taking Better Photos

Amanda Murphy January 9, 2024

Photography for me is one of the best ways to hone in on my skills as a creative. The principles that shooting photos teaches you allows you to learn more about lighting, composition, storytelling, and more.

Here are some of my tips I’ve learned over the years to level up the way you shoot photos:

1) Look For Different Angles

Often, we find ourselves shooting at eye level when taking photos, as it seems like the most natural thing to do when we draw our viewfinders up to our eyes. But, an easy way to enhance the diversity of your photography is to actively seek new angles to shoot from. Crouch down to get a lower perspective, or get even lower by placing the camera on the ground. Shoot from hip level. Try out a dutch angle, where you tilt the camera roughly 45 degrees in either direction. Point the camera straight at the ground or up to the sky. These are all just possible examples, but this is a great opportunity to really let your imagination run wild and shoot from all angles. Below is an example of a recent photo I took in Joshua Tree National Park, where I crouched lower to the ground to get more of a low angle, grand shot of these large rock formations.

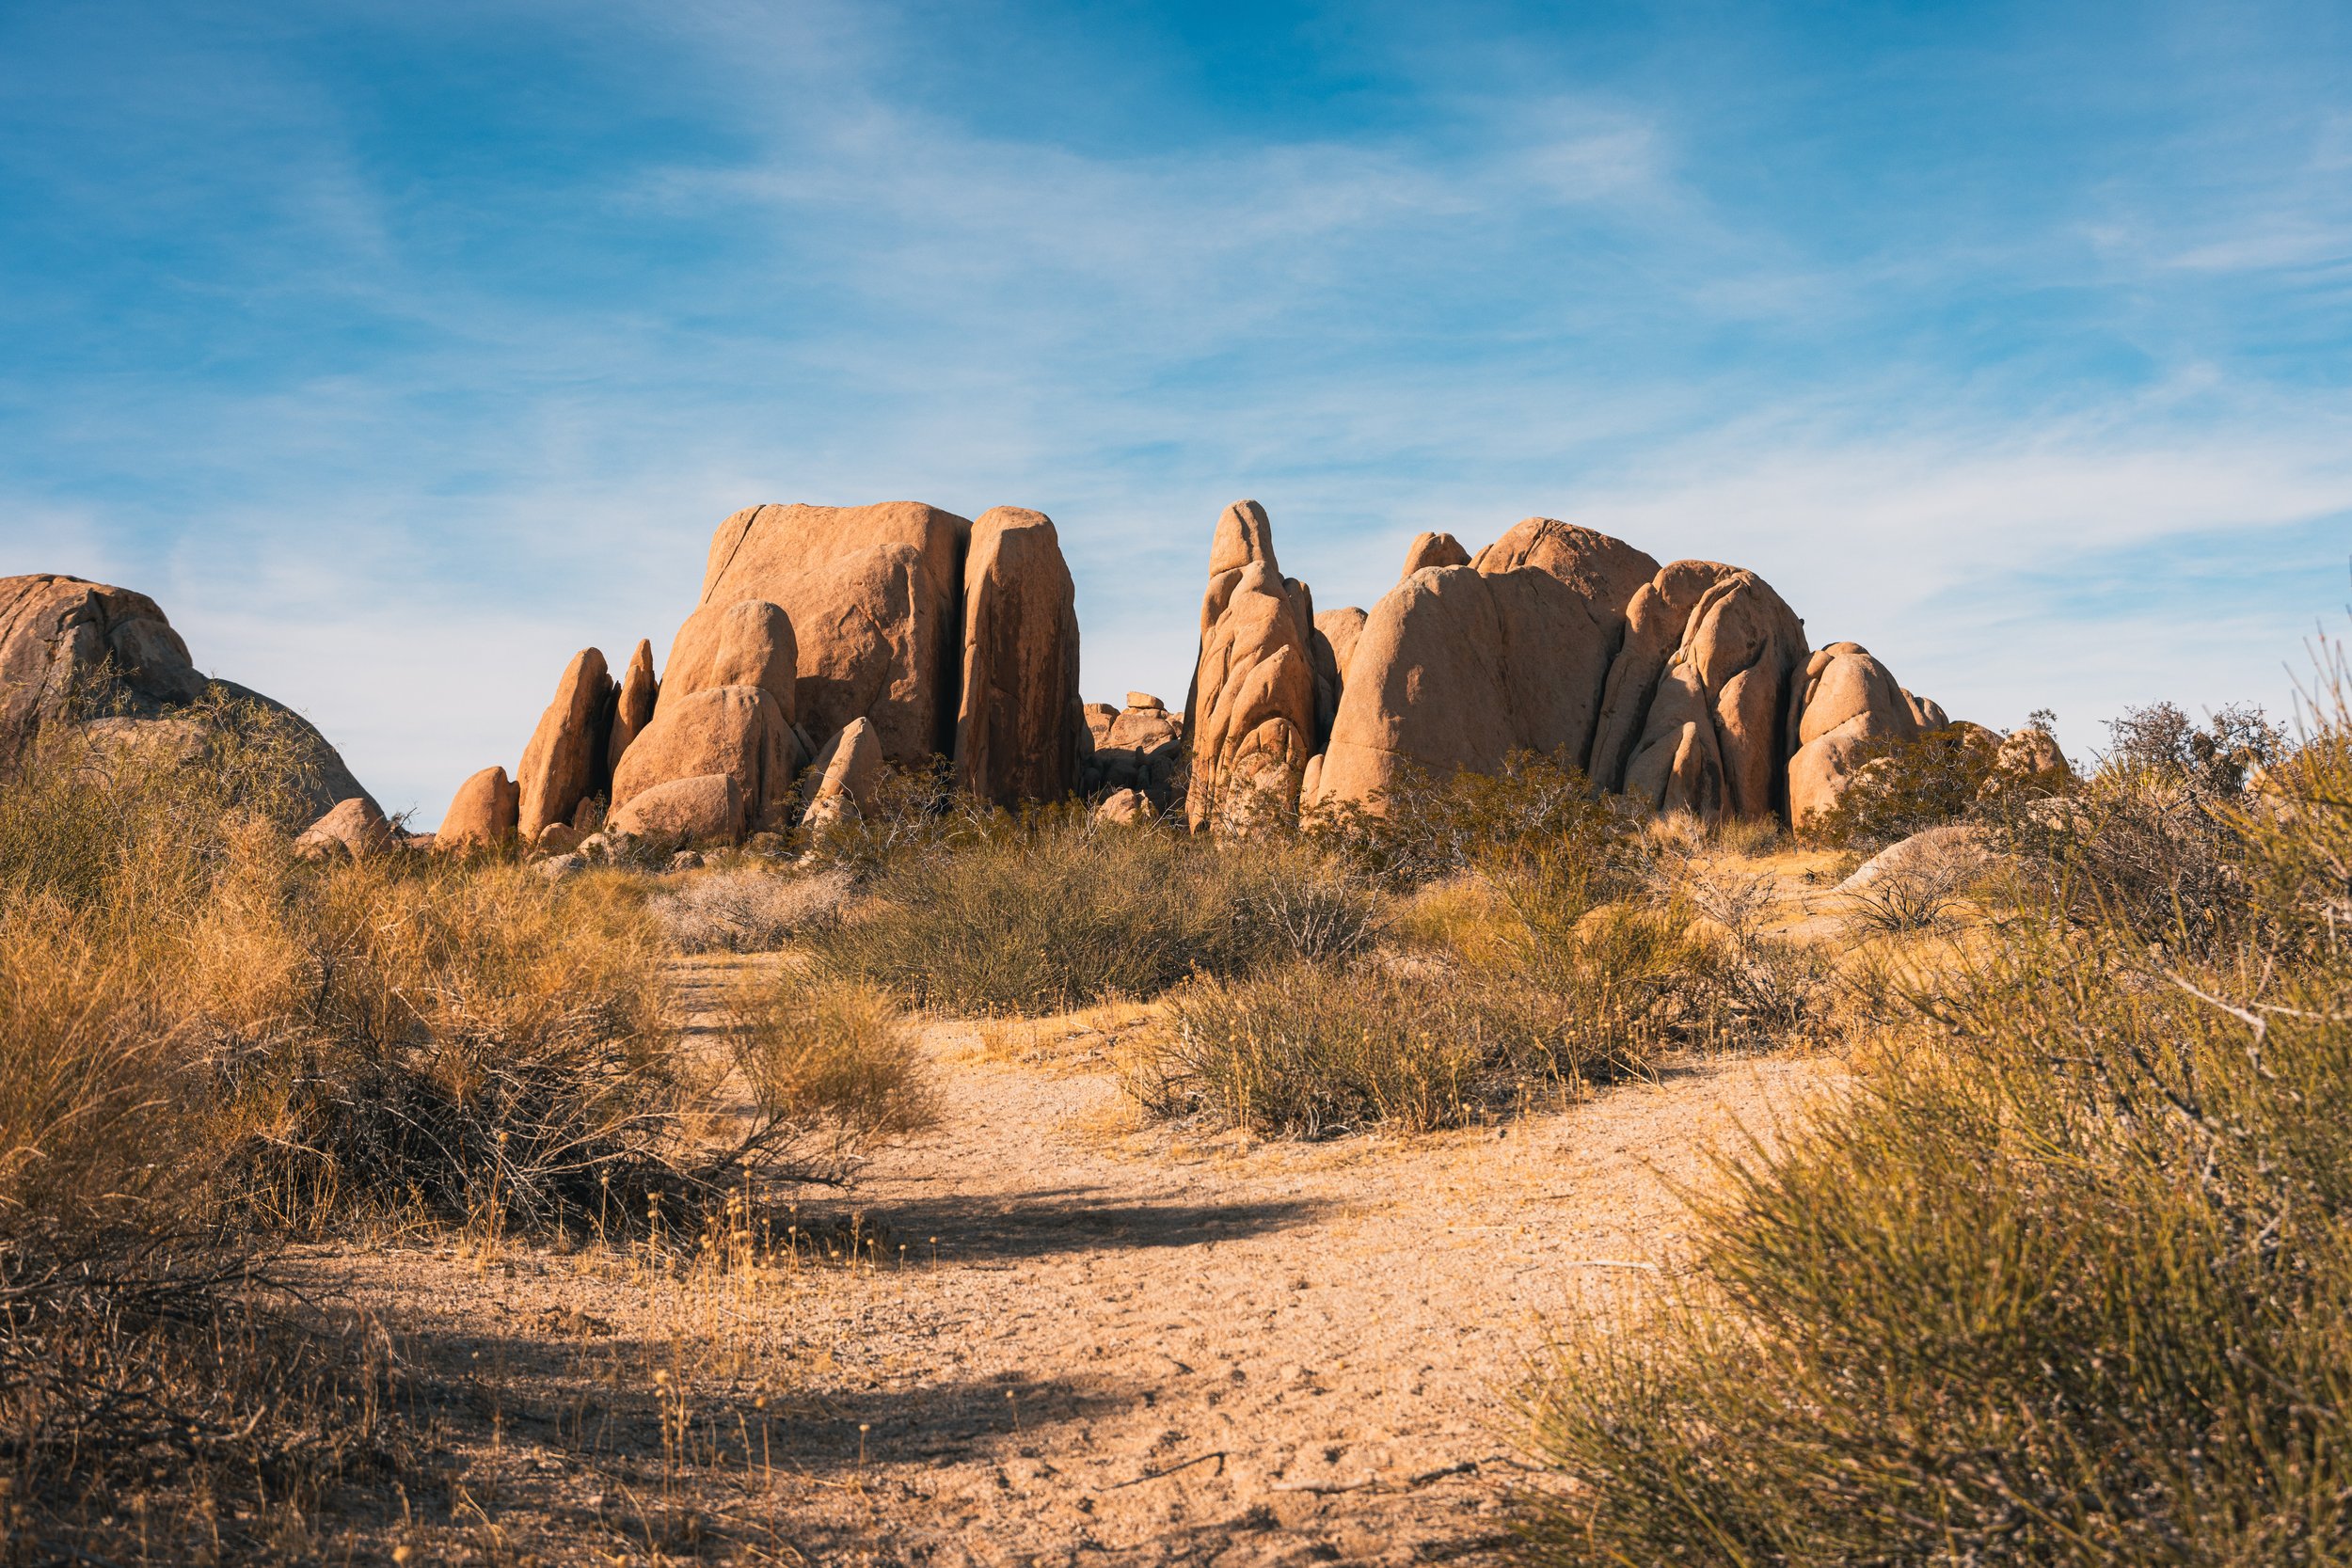
A towering rock formation in Joshua Tree National Park.

2) Try Out “Natural Frames”

This is one of my favorite things to do when shooting photos. This is potentially easier with some categories of photography than others. I often take landscape or nature photos, and I love to search for “natural frames” in the environment around me. A specific example would be during the fall season, looking for low hanging branches with changing leaves to shoot through. Doing this creates a level of depth and focus in the image that otherwise might not be possible. Below, you can find an example of a photo of mine from a fall photo adventure in Boston a few years back where I put this into practice.

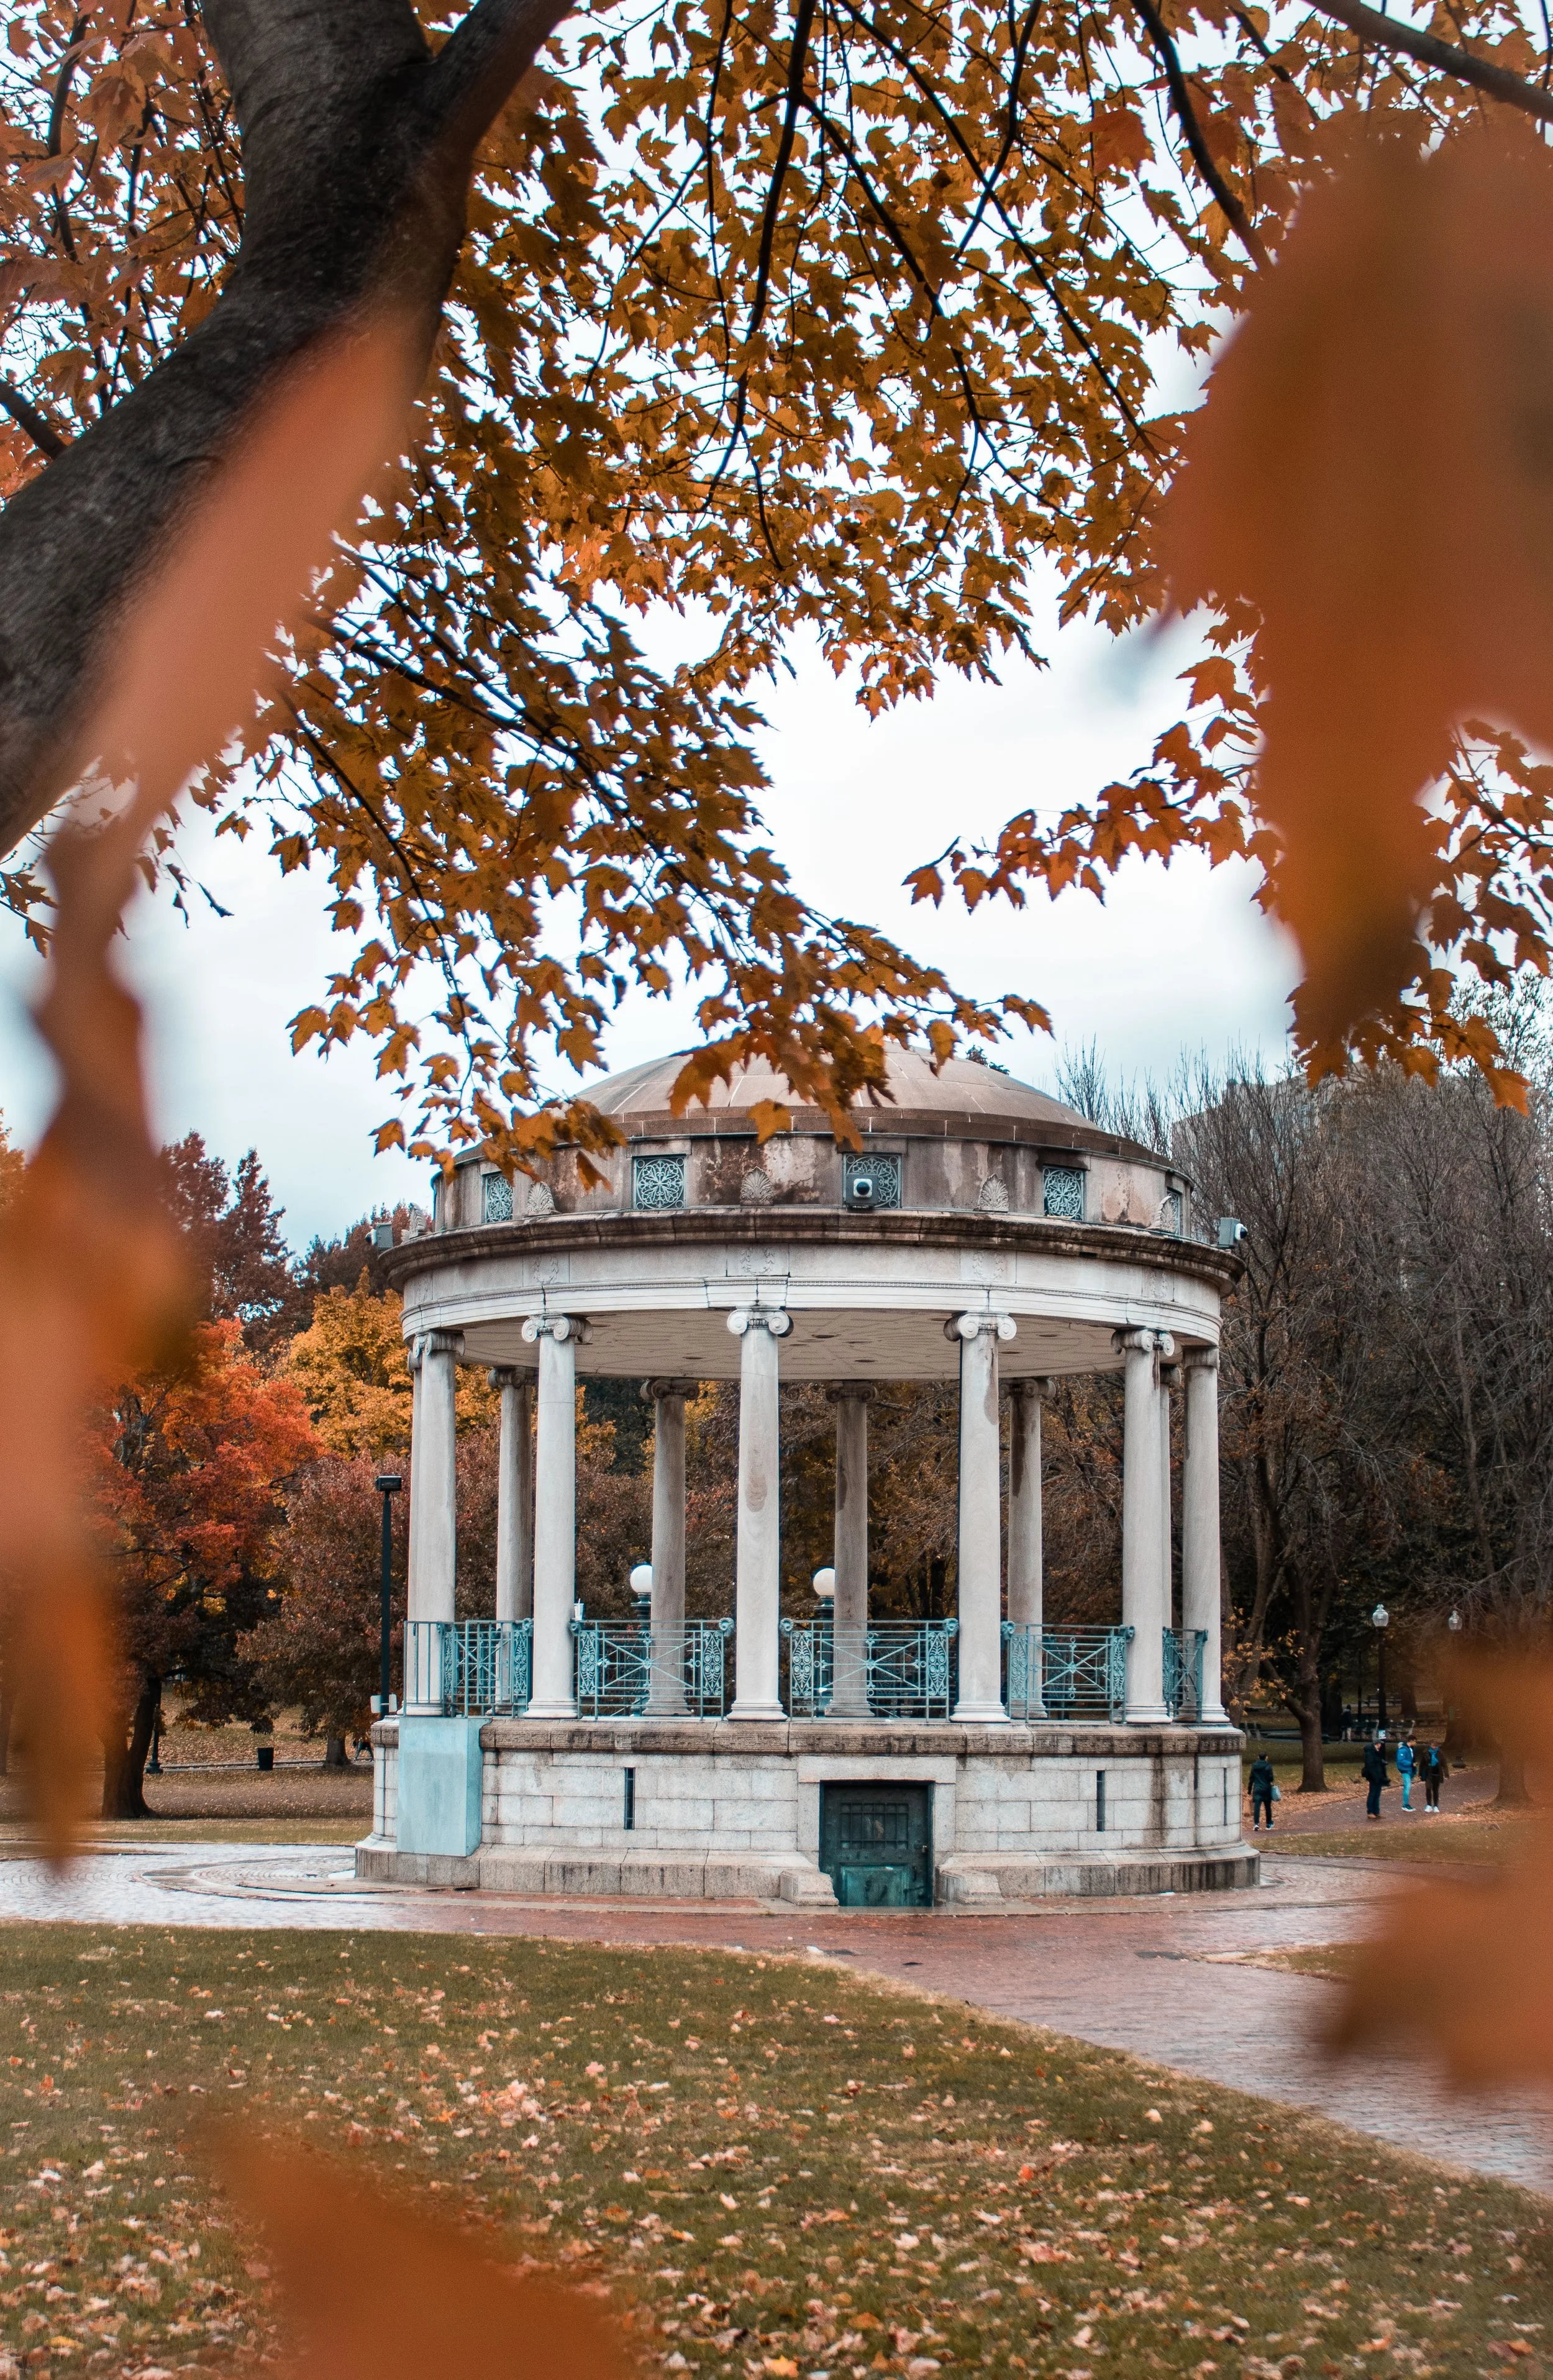
The Parkman Bandstand in Boston on a rainy November day.

3) Keep In Mind The Time Of Day & Weather

What time of the day you’re shooting and what the weather conditions are has a huge effect on the style and lighting composition of your photos, particularly if you’re shooting outside.

Sunrise and sunset are often ideal, because the light is more diffused and pleasing.

Mid-day, especially if it’s sunny outside, the lighting can be harsh when the sun is at it’s highest, brightest point in the sky. This creates harsh contrast between shadows and highlights.

When shooting landscapes and street photography, I often find overcast days to be ideal, since the clouds create diffusion, even under mid-day sun conditions. The only downside is that, depending on what you’re shooting, the cloudy sky can have an effect on the tone of your photos, potentially making them more moody. A blue sky conveys a brightness and generally more positive tone in an image.

Shooting at night, when the sun is mostly gone, provides it’s own unique challenges. You need to have a camera that performs well in low light situations, to prevent noise from ruining your image, or some sort of adequate light sources to bring up the exposure. This could be something more natural to the environment, such as shooting objects under a street light or next to a bright neon sign, or something more artificial by bringing in lights or flashes.

The photo above that I took of the Parkman Bandstand in Boston is a good example of thinking about a lot of these aspects - it’s overcast, so the lighting is very even and diffused, and it had just rained, which makes the pathways glossy and adds an overall moody tone to the image. All of which was accentuated by the way I edited the photo to add contrast.

4) Think About Lens Choice

Choosing the right lens for your photography is essential, as it aids heavily in the storytelling aspect of your photography. Taking photos at different focal lengths not only effects the physical result of your photography, but can elicit different moods and meanings.

Wide angles have a tendency to create grand, powerful images of subjects looking larger than life. Medium shots can create a “normalcy” to an image, simply capturing a slice of life, as medium focal lengths tend to mimic what we see out of the human eye. Long focal lengths can often create an intimate closeness and focus, separating a subject prominently from it’s background.

For more on what lens might be right for you, check out my previous blog post, “The Best Lenses When You’re Starting Out.”

5) Think About Scale/Juxtaposition In Your Photos

Juxtaposition is the act of placing two elements close together, often to highlight the contrast between the two. When I’m taking photos, one of my favorite ways to create this contrast is to position people or objects in a scene that adds a certain grandness to the scene. A good example of this is in this photo below that I recently took on a trip to Joshua Tree National Park.

A lone hiker traversing through a rocky desert in Joshua Tree National Park.

I could have easily not included the hiker in the photo. In fact, I took a few versions of this exact photo where the hiker had not stepped into frame just yet. But, by including the hiker in the photo, it creates a sense of scale. The hiker seems so small in comparison to the environment around him, with the towering rocks along his path. Including the hiker also creates depth because they are more in the foreground, and what is on the path ahead of them is more in the background. These two details, the positioning and size, create this grandness to the image that is even more apparent with the hiker remaining in the image. In addition to creating juxtaposition with position and size, you also can do this with other aspects such as light and color.

Tags photography, composition, light, lenses, cameras, learning
Comment
Camera lenses lined up on a shelf.

The Best Lenses When You're Starting Out

Amanda Murphy November 28, 2023

The answer to this is pretty subjective. You’ll find a variety of answers out there.

In my opinion, the answer to this is entirely dependent on what type of content you’re shooting and what skill level you’re at. But overall, there are a lot of factors to take into account when selecting lenses.

Here are the main aspects I would take into consideration when looking at a lens, particularly when you’re just starting out:

  1. PRICE

    It’s no secret that lenses can be incredibly expensive. They are definitely an investment. When you begin to go down the path of searching for and purchasing a lens, it’s important to take into account what you can afford versus what you want. When you’re just starting out, I’d recommended going for a “middle of the road” price range - which will be different for each person depending on your budget. If you’re really serious about the purchase, I would personally avoid going too cheap. If you save up and invest in decent glass (note: people often interchangeably use “glass” in place of “lens”), it will last you. Based on current lens prices, a price range I would consider would be anywhere from $500 to $1200. This price, again, is so dependent not only on what you can budget for, but also on what you’ll need the lens to be capable of, which we’ll get to next.

  2. LENS MOUNT TYPE

    Pretty much every camera manufacturer has a different lens mount. Canon has the EF and RF mount. Sony has the E mount. Leica has the L mount. There are a few that cross camera manufacturer barriers, such as the PL mount (that mount style is typically reserved for cinema cameras). When selecting lenses, you’ll want to take this into account. Prices can also vary across the lens mount types. A good example is how much Canon RF mount lenses cost versus Canon EF mount. While EF mount lenses are still expensive as well, because RF lens technology is so new and more innovative, the prices are higher. Given this, you might be more tempted to buy a Canon EF mount lens and get an EF to RF adapter to be able to put your EF lens on an RF body. Related to this, brands like Sigma and Tamron make lenses that are available in multiple lens mount types, and are often more affordable than the name brand lenses. Quality can vary on third party lenses, but it really just depends on which specific lens you’re looking at from these manufacturers.

  3. SENSOR COVERAGE

    Lenses are designed to cover certain sensor sizes. You’ll want to note what size your camera sensor is when selecting what lens to buy. If you have a full frame camera body, you’ll want to get a lens that can cover full frame. If you don’t, and say buy a lens that only covers Super35/APS-C sensors, you’ll at the very least get heavy vignetting at wide focal lengths, and possibly lose other qualities such as sharpness. On the flip side, if you have a lens designed for full frame cameras on your Super35/APS-C body, you’ll have a decent amount of crop. This can be advantageous in some situations if you want to get longer focal lengths with a usually cheaper and smaller camera body.

  4. FOCAL RANGE

    You’ll want to figure out what focal range you need your new lens(es) to cover. And with this, do you want to invest in a zoom lens, which can be more versatile and more bang for your buck? Or do you want to invest in a set of prime lenses, which can achieve generally better image quality? Like I said, as you’re starting out especially, a zoom lens can be really useful. You can buy one lens that covers a wide range and you don’t have to worry about swapping lenses. But, investing in a set of prime (or even just one prime lens to start) can also be a good option. If you were going to invest in a prime lens, and only pick one to start, I’d think a lot about the main type of content you’re shooting. What does the kind of shooting you do necessitate? If you are a photographer that shoots wide landscapes primarily, I’d recommend getting a wider prime (16mm, 24mm). If you shoot a lot of portraits, I’d go with more of a longer lens (85mm). If you need something more versatile, go for a medium distance (35mm, 50mm). This thought process can also be used for selecting a zoom lens, but just thinking more about what versatility you need from the focal range.

  5. AUTOFOCUS

    Not all lenses have autofocus capability. This is particularly true of cine style lenses. The manufacturer’s of these cine lenses are designing them for film sets where there is a focus puller. If it’s important that the lens you buy have autofocus, be on the look out for that in the specs. Also, note that the newest lenses will (most times) have the best autofocus technology within them. So if you were, for example, looking at buying the Canon EF 16-35mm f/2.8 lens, the 3rd generation of this lens (denoted as “III” in the product title), will have the quickest and most effective autofocus response.

  6. IMAGE STABILIZATION

    This goes hand-in-hand with point #5 - not all lenses have image stabilization built into them. This is often a trait of mostly photography zoom lenses. Image stabilization can come in handy when shooting handheld especially. Some camera bodies have in-body image stabilization (IBIS) built in, and when coupled with a lens with image stabilization, you can achieve some smooth results. A lens with image stabilization can come in particularly handy if you have a camera body with no IBIS. At least the lens with provide some help in controlling the image’s stability.

  7. FOCUS READ-OUT

    This is kind of a small detail, but one I wish I knew to look for more when I was first starting out. If you want to be able to have a visible, numerical readout of what focus point you’re at, and you want the focus ring to physically stop at the beginning and end of the focus range, you’ll want to look for that in a lens. Some lower end lenses don’t have either of those, particularly the kit lenses that come with most DSLR and mirrorless cameras. Especially when your camera doesn’t have any sort of focus assisting features, this can make pulling manual focus a nightmare. In most circumstances, at that price point, you’re probably just using autofocus, but if you want to do something like night sky photography, knowing what focus point you’re at is crucial.

  8. FIXED VS VARIABLE APERTURE

    This common lens trait is often the sign of cheaper versus more expensive glass. A fixed aperture on a zoom lens means that the given aperture will stay throughout the focal range. For example, if you have a 24-70mm lens with fixed aperture, when you set your aperture to f/2.8, your lens will stay at f/2.8 no matter if you are at 24mm or 70mm. A variable aperture means that the aperture will change as you zoom in or out. For example, if you have a 18-55mm kit lens and you set the aperture to f/3.5 at 18mm, when you zoom into 55mm, the aperture will close down to probably around f/5.6. Variable aperture can be a problem if you want to have a live zoom move while shooting video, as you will see the light change through the focal range. It can also pose a problem in low light situations if you need to zoom all the way in on something. So knowing whether a lens has a fixed or variable aperture is important.

  9. PHOTO LENSES VS. CINE LENSES

    I’ve already touched on this in some of the points above, but there are distinct differences between a lens designed for photography and a lens designed for filmmaking.

    PHOTO LENSES:

    1. Don’t have rings with teeth for changing focus (you have to buy an adapter if you want to use something like a follow focus)

    2. Often have autofocus and image stabilization built in

    3. Can have variable aperture

    4. Generally cheaper than cine lenses

    5. More lightweight

    6. Available as prime lenses or zooms pretty equally

    7. Most are varifocal, meaning the focus changes when the focal length of the lens changes

    CINE LENSES:

    1. Parfocal, meaning the focus does not change when the focal length of the lens changes

    2. Don’t have autofocus or image stabilization

    3. More precise manual focus, iris, and zoom controls

    4. More artistic/stylized

    5. Generally heavier than a photo lens (but not always)

    6. Most often prime lenses, but zooms are also available

    7. Cine zoom lenses don’t expand or change in length as it adjusts the focal distance internally, which is more convenient for camera setups

    8. T-stops offer a more exact measure of the amount of light that passes through the lens

    9. More expensive than most photography lenses (but not always)

Now that I’ve listed all the aspects of lenses to consider, here are some of my personal, general recommendations for lenses to start out with, within price ranges. I have these listed as Canon EF/RF mount lenses, but you can find equivalents for most of these for whatever camera manufacturer/lens mount you prefer. Or, you can also find adapters to adapt these specific EF/RF lenses to a variety of camera bodies:

PRIME LENSES

LESS THAN $500

  1. Canon RF 16mm f/2.8 STM Lens | $249

  2. Canon RF 24mm f/1.8 Macro IS STM Lens | $499

  3. Canon RF 50mm f/1.8 STM Lens (Canon RF) - The “Nifty Fifty” | $169

Canon_RF_16mm_f2.8.jpg
Canon_RF_24mm_f2.8.jpg
Canon_RF_50mm_f2.8.jpg

$500 TO $1000

  1. Sigma 24mm f/1.4 DG HSM Art Lens for Canon EF | $779

  2. Sigma 35mm f/1.4 DG HSM Art Lens for Canon EF | $779

  3. Sigma 50mm f/1.4 DG HSM Art Lens for Canon EF | $779

Sigma_EF_24mm_f1.4.jpg
Sigma_EF_35mm_f1.4.jpg
Sigma_EF_50mm_f1.4.jpg

OVER $1000

  1. Canon RF 85mm f/1.2 L USM Lens | $2499

    (Alternative: Sigma 85mm f/1.4 DG HSM Art Lens for Canon EF | $1199)

Canon_RF_85mm_f1.2.jpg
Sigma_EF_85mm_f1.4.jpg

ZOOM LENSES

LESS THAN $500

  1. Canon EF-S 18-55mm f/3.5-5.6 IS II Lens | $149

  2. Canon RF-S 18-45mm f/4.5-6.3 IS STM Lens | $299

  3. Canon RF-S 18-150mm f/3.5-6.3 IS STM Lens | $499

Canon_EF-S_18-55mm_f3.5-5.6.jpg
Canon_RF-S_18-45mm_f4.5-6.3.jpg
Canon_RF-S_18-150mm_f3.5-6.3.jpg

$500 TO $1000

  1. Sigma 18-35mm f/1.8 DC HSM Art Lens for Canon EF | $679

  2. Canon RF 24-240mm f/4-6.3 IS USM Lens | $899

Canon_RF_24-240mm_f4.0-6.3.jpg
Sigma_EF_18-35mm_f1.8.jpg

OVER $1000

  1. Canon EF 24-105mm f/4L IS II USM Lens | $1299

  2. Canon EF 24-70mm f/2.8L II USM Lens | $1899

    (Alternative: Sigma 24-70mm f/2.8 DG OS HSM Art Lens for Canon EF | $1299)

  3. Canon EF 16-35mm f/2.8L III USM Lens | $2199

Canon_EF_24-105_f4.0_II.jpg
Canon_EF_24-70mm_f2.8_II.jpg
Sigma_EF_24-70mm_f2.8.jpg
Canon_EF_16-35mm_f2.8_III.jpg
Tags cameras, lenses, beginner, lens types, zoom lenses, prime lenses
Comment

Search Posts


Featured Posts

Featured
Jan 9, 2024
5 Tips For Taking Better Photos
Jan 9, 2024
Jan 9, 2024
Dec 21, 2023
Never Forget Anything Again With This Shoot Prep Checklist!
Dec 21, 2023
Dec 21, 2023
Nov 28, 2023
The Best Lenses When You're Starting Out
Nov 28, 2023
Nov 28, 2023

Powered by Squarespace